Breaking News
Loading...

Recent Post

Selasa, 26 Agustus 2014
See what’s poppin in the ITC - Bulletin Board Project

See what’s poppin in the ITC - Bulletin Board Project

08/26/2014

Those that follow this blog know that we do everything from low-tech to high-tech projects at the Instructional Technology Center. It is important to keep a "hands-on" component in learning activities, especially for children. 

The following is a guest post from one of the ITC’s Graduate Assistants, Amy Cross. Amy is great at putting together bulletin board ideas for our preservice teachers and sharing ideas for the classroom. Here is how she created the back to school bulletin board.


First things first, I love Pinterest.  If you are trying to craft or create anything, check out what Pinterest has to offer!  In the search box, I typed in Bulletin Boards.  A bunch of ideas come up!  I was looking for something that Education Majors, or anyone that is crafty, would find useful to them.  I settled on a picture of a bulletin board that was announcing the students in the class with popcorn. If this were for your classroom you could add the children's name and/or picture to each popped kernel of popcorn. Even better, have each child create their own kernel to post to the bulletin board.

Once I had my idea covered, I began measuring the bulletin board to figure out how much paper I would need.  I chose black as the backdrop, and red to outline the outside of the bulletin board.  Next, I decided to work on the statement that would be on the bulletin board.  So often people leave the lettering last and the design might not leave room for the lettering.  Using the Ellison Die-Cutters and yellow paper, I cut out the letters “See What’s Poppin’ In The ITC”. 

The next step was to make the popcorn box.  Using red paper, I freehanded the cut-out of the popcorn box, and then I added strips of white paper to give it a fun look.  After that was done, I put the popcorn box onto the bulletin board, and stapled on the lettering.  At this point, a majority of the work was completed! 

The last step was to create the popcorn that would be scattered around the bulletin board.  I used white laminated construction paper, and cut out fun popcorn shapes.  What makes creating popcorn so fun is that it does not have to be perfect!  After the popcorn is cut out, you can begin to put up the shapes where you have room to finish your bulletin board.   All done!

A big thank you to Amy for sharing her bulletin board skills will all of us.

Keep on Learning!
Tom Grissom, Ph.D.

@tomgrissom


Selasa, 19 Agustus 2014
ITS Installs New Wireless Access Points

ITS Installs New Wireless Access Points

08/19/2014

Welcome back to another school year!

There have been many improvements regarding educational technologies that have occurred over the summer and today I would like to share one that directly impacts our students. 

The EIU Information Technology Services (ITS) department recently installed 34 new wireless access points in the Buzzard Hall building replacing the existing access points that were originally installed in 2004.


Replacing the ten year old wireless technology is a huge improvement to say the least. Preliminary testing has been impressive. This upgrade installation comes just in time for our students as they return next week for the first day of class.

Having access to wireless networks is just expected on a modern college campus. Wireless access, like electricity, is often taken for granted but it does take time, money, and effort to provide these services.

Here at the Instructional Technology Center (ITC) we are very much looking forward to this increased speed and capacity. We have available two Laptop Carts, two Windows 8 Tablet Carts, and one iPad Cart that are routinely checked out to classrooms for technology infused instruction. The recent wireless improvements will provide a better classroom experience and make new things possible as we continue to improve the teaching & learning experience for our faculty and students.

So, if you happen to notice an Internet speed improvement when visiting the ITC using your laptop, tablet, or mobile phone you can thank the invisible army of tech support workers that have worked behind the scenes over the summer to make this possible.

P.S.
If you can read this post be sure to thank a techie, they make it possible.

Keep on Learning!

Tom Grissom, Ph.D.
@tomgrissom


Senin, 14 Juli 2014
Adding the Bond Email Module to your iLearn Welcome Page

Adding the Bond Email Module to your iLearn Welcome Page

Adding the Email Module to your iLearn Welcome Page


Most students use iLearn as their online 'home base' for working between systems and communicating via email with Bondies


If you find you're constantly switching back and forth between iLearn and your Student email account, why not follow this quick procedure to add Bond Email as a module to your Welcome Page 


That way you can link to your email from within iLearn in a new tab while keeping your iLearn tab open and accessible


What do I need to do?


1) It's simple.  Log into iLearn and click on Welcome (we recommend using Firefox)

2) In the upper left corner click on Add Module>Toolbox>Email


3) Click on 'Add'

4) Once the module installation completes, you will now see links to both Staff and Student email on your Welcome Page


Bonus tip:

Consider customizing your iLearn Welcome page by adding other modules to save time spent searching for links

Modules available now:
  • calculator
  • dictionary
  • student timetable 
  • exam timetable
...and many more!
Kamis, 10 Juli 2014
no image

Opening a Page as modal window using JSOM in SharePoint 2013

There are many scenarios where we need to open custom pages or OOTB pages in a pop up. SharePoint provides an API to open the pages in pop up and in this post we will see how we can achieve the same using on the client side using JSOM

We will explore the following methods from the SharePoint 2013 client side library which will help us in opening the page as a dialog.

We will consider the following scenario when opening the page as a dialog:

  • How to open the page in a dialog
  • How to pass data to the dialog page
  • How to return parameters or data back to the calling page from the dialog page
First we will see how to open the page in a dialog window. In order to open the page in a dialog, first we need to set the dialog window properties such as

  • Dialog Window Title
  • URL of the page to be shown in dialog window
  • Width and height
  • Allow dialog to maximize
  • Allow dialog to close
  • Need callback from the dialog window to the parent window
  • Data for the dialog window that needs to be passed from the parent window
So, I have written a function in javascript with those parameters that can be called from the parent window. The below JavaScript code will show that information


We have written a function called openInDialog which can be called from the Parent page and to this method we are passing all the parameters such as title, width, height etc. that discussed above


Then we have created a variable called options which has to be a JSON object that needs to be passed to the SharePoint JavaScript function which we will discuss later


Ensure that you use the same key names in the options variable such as args, showClose, allowMaximize etc

Its always better to pass data in JSON format to the modal window

If we need callback from the dialog window, we need to set a property called dialogReturnValueCallback. To that property, we need to set a custom call back function that will be called when the user closes the dialog window


Here the closeDialogCallBack is a custom callback function that will be called when the user closes the dialog window. We will explore this custom callback function later in this post

To open the page in a dialog, we need to call a sharepoint function called showModalDialog which is defined in the namespace SP.UI.ModalDialog and this name space is present in the JS file sp.ui.dialog.js


To showModalDialog function, we are passing options as a parameter which we have created above

In the dialog window, we can access the data that is passed from the parent window as follows


dialogArgs contains the data that is passed from the parent window
Once the business is completed in the dialog window, the user will press OK or Cancel button in the dialog window.

Before clicking on OK or Cancel button, we need to prepare data that needs to be passed to the parent window. We will see how to prepare the data that needs to be passed to the parent windows


In the above code, we have created a javascript array and to this javascript array we are setting some data and we want to send this data to the parent window and the parent window can take some action based on the data that is sent from the dialog

There are two actions that can be done in the pop up either OK or Cancel. Here are the SharePoint functions for OK and Cancel click events

When the user click on "OK" button, we can call the below SharePoint function
 
SP.UI.ModalDialog.commonModalDialogClose(SP.UI.DialogResult.OK, popData);

When the user click on "Cancel" button, we can call the below SharePoint function

SP.UI.ModalDialog.commonModalDialogClose(SP.UI.DialogResult.cancel, popData);

 As you can see, we are passing popData javascript array to both ok and cancel button.

 commonModalDialogClose sharepoint function internally calls the callback function that we discussed earlier in this post.

In our case we have created a call back function called closeDialogCallBack and this will be called when we close the pop up


Senin, 07 Juli 2014
1 TB of free Online storage for all Bond Students

1 TB of free Online storage for all Bond Students

Office 365 for all Bond Students, now with 1 Terabyte of free Online Storage

Never lose a file again! 

Put away that USB storage stick and back up everything in the Cloud!!

In addition to your 50 GB email inbox, Bond Students never need to worry about running out of storage room for file storage


Don't forget your files can be accessed on any connected device and you also have free access to:
  • Word
  • Excel
  • Powerpoint

Want more information? 

Check out this article


Rabu, 18 Juni 2014
How to setup a Surface Pro tablet with multiple monitors to replace your desktop computer

How to setup a Surface Pro tablet with multiple monitors to replace your desktop computer

06/18/2014

The following is a guest blog post from Mike Gioia about how he has replaced his old desktop computer with a Surface Pro 2 tablet. There is a twist to this story as Mike has figured out a way to connect FOUR external monitors to his setup using a special docking station and adapters. He now has the best of both worlds; having a desktop computer for hard-core computing tasks, as well as a tablet for a more mobile experience when needed. Instead of buying three different devices (a laptop, a tablet, and a desktop computer) Mike is now using just one device that is flexible enough to meet both his desktop and mobile needs. Here is his story about how he setup a multi-monitor desktop solution using the Surface Pro 2 as the center piece. 


Replacing a desktop computer with a Surface Pro 2 tablet
by Mike Gioia 

While we become more and more mobile so too have our devices. With that being said it is still nice to have a traditional desktop computer at your desk when you are working or studying.  I have grown accustomed to having multiple monitors at my desk as it helps me be more productive. I like having the ability to edit documents on one screen while having an old version on another, plus maybe a website on another monitor.  I also leave my email open on a different screen so I can monitor it with just a glance.  I don’t think I could work at a desk now without at least two monitors. 

Currently I have four monitors, well actually five, but more on that later.

As an information technology support person I am also required to be mobile but I still want a "real" computer at my main desk for the heavy-duty work.   

My desktop computer was not aging very well and my employer decided to replace it with a new one and a new tablet so I could be more mobile.  In the interest of cost saving, I told my employer that if I could get a tablet to work with four monitors would that be something they would support. My supervisor agreed and left the setup to me. 

I did a little research and with the Surface Pro docking station by Microsoft I knew I could do multiple monitors but not four. This was a challenge now, can the Surface Pro 2 actually support four monitors? I thought to myself, "I don't see why it couldn't with video card it has.”  With more research  (AKA Google) I found a blog post showing the Surface Pro 2 supporting four monitors.   


From this blog post I found the equipment I needed.  One Plugable USB 3.0 docking station and two Plugable USB 3.0 to DVI adapters.  With a total cost around $200 I was on my quest to have my four monitors, a desktop computer, and a tablet all in one setup.


Setup was fairly straight forward.  Of course I didn’t read the instructions at first and could only get two to monitors to work.  After a complete uninstall of the drivers and new install BEFORE connecting everything I had all my monitors working within a few minutes. 

The other great thing I wasn't expecting was that I actually have five monitors now.  The Surface Pro functions as a fifth monitor and has the added bonus of being a touchscreen!   

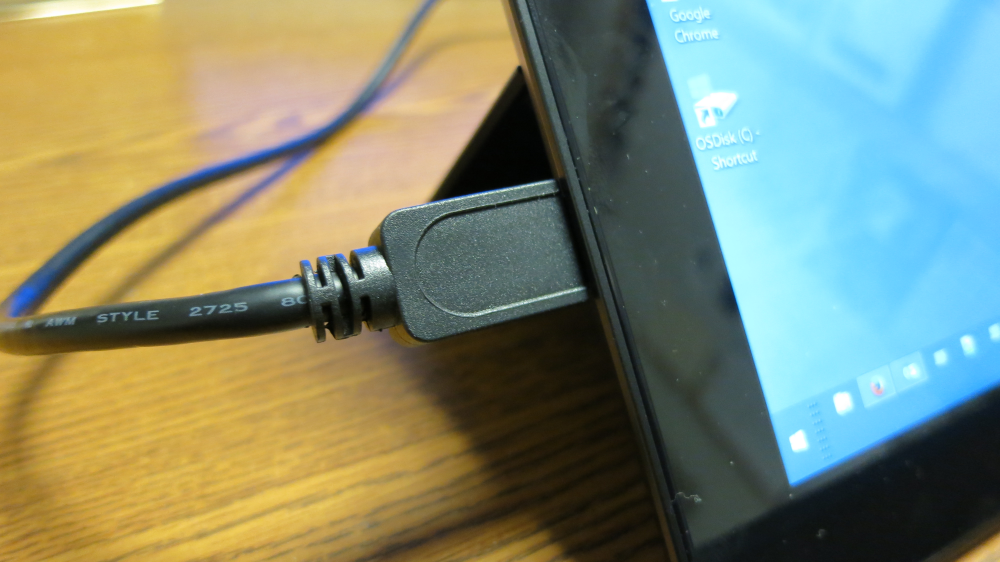
Another great thing is that the Surface Pro 2 drives four monitors plus a mouse, network connection, audio, ten USB ports, and a keyboard all with ONE cable.   There is only one USB 3.0 cable connected to the device.  When I need to go somewhere I only have to remove one cable.  


Of course, the behind the scenes view does have a few cables for all the other connections but just one cable goes to the Surface Pro 2 USB port.


Performance wise I have not noticed any performance issues.  No lag in the mouse from screen to screen, even while video is playing on multiple screens.  

The part that has really sold me on the Surface Pro 2 is that it uses a full operating system and can run regular full-powered x86 applications I can now take my office computer with me anywhere.

It is also a lot easier to secure when I don’t need to take it with me from my office.  I can just unhook the one cable and lock it in my desk drawer.  

Shortly after I got the Surface Pro 2 a colleague asked me at a conference if I could remote into my office computer with my tablet. I chuckled and said "What office computer? This is my office computer."  


I have been using this setup for over two months now and I forget that I’m not using a desktop computer until I realize I’m not kicking the big tower that used to be stashed under my desk.     


Mike Gioia 
Information Technology Services
Eastern Illinois University


A big thank you goes out to Mike Gioia for sharing his setup with ITC Chronicles readers.

Keep on learning,
Tom Grissom, Ph.D.

@tomgrissom

Quick Message
Press Esc to close
Copyright © 2013 Microsoft Office 365 All Right Reserved